- Jenny Walker

- May 20, 2025
- 6 min read
Hello, Gentlefolk,
As I sit at my writing desk, the sun is rising into a soft blue sky that holds a single cloud hazy with lavenders and roses. I can hear wood pigeons in the hedge, and there are a couple of Robins hopping around the daisies finding an early breakfast. As I stood in the garden watching the world wake up around me, I have to admit that I took a deep breath in as I became overwhelmed at the beauty of it all. It’s a magical place to call home, and I am so pleased that I am able to share it with you. Today, I thought I would tell you the story of the day I forgot my phone, (and sewing a bucket hat).
It’s been quite the whirlwind here at The Knitted Wardrobe over the past couple of weeks as we have been enjoying one of the most beautiful months of May. Beaches and rivers have been calling, and being able to find time to play on the waters has been the focus of my days. Grebe has become a beautiful evening retreat spot after a day spent writing in the library, and Gylly is turning out to be a fantastic mid-week after work hang-out with friends. But the Helford River was calling for our attention on Sunday, and one place in particular; Frenchman’s Creek.
There is one fact about pottering around in a canoe with a good friend on a sunny Sunday, and that is the fact that you will get sunburn very quickly if you don’t take care (believe me, I
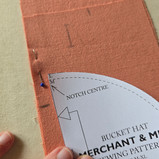
have learned the hard way!). I am now quite good with the old sunscreen application, however the top of my head often feels like it’s taken a hit. As I was thinking about it on Saturday morning over a cup of tea, I realised that I needed a classic bucket hat to help make my head feel comfortable and also keep the sun off my face. However, spending money on a hat wasn't something I really wanted to do, and it wasn’t until I was in the shower that I remembered that Merchant and Mills offer a free to download bucket hat pattern, and I had enough fabric in stash to rustle something up.


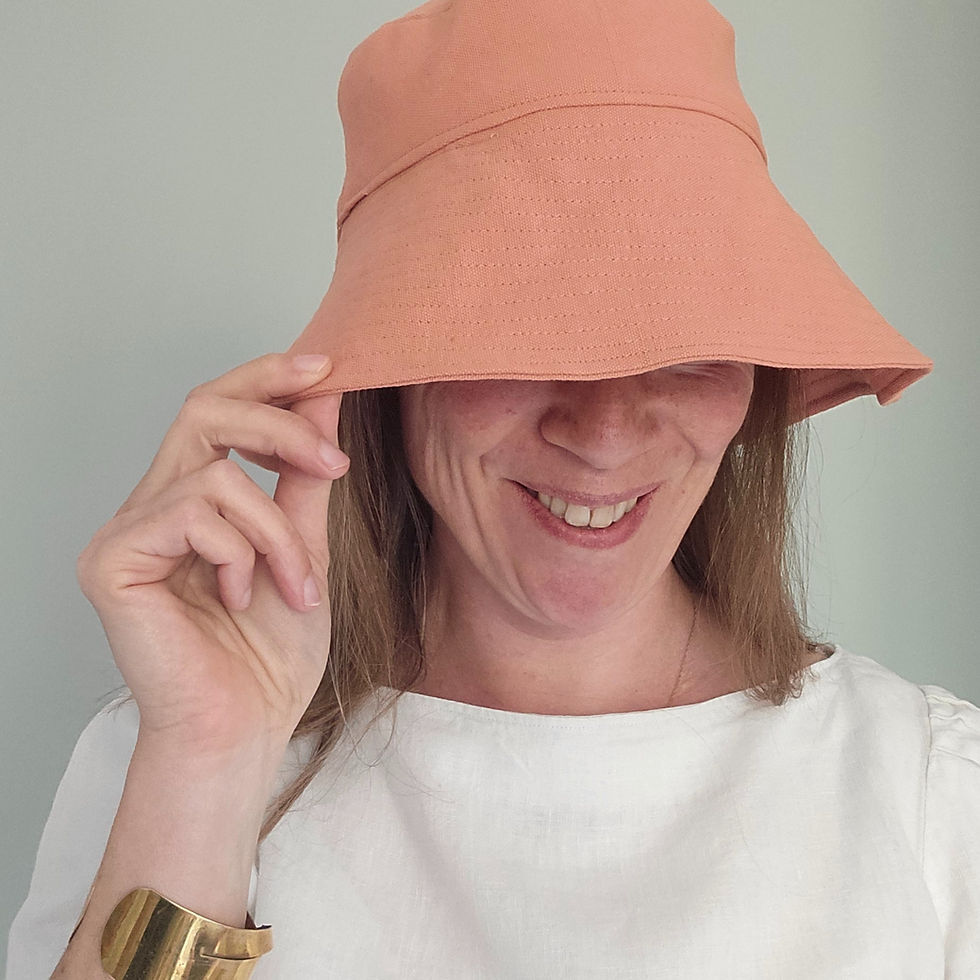
The result was my first ever hat, and I have to say that I am quite pleased with it! It’s in a soft 8oz cotton pink twill, and the lining is in the Indian block print that I ordered about three years ago; 3.5m of it arrived before I decided that I didn’t like it for a dressing gown, so it’s been implemented in almost every project since. The pink twill was the off cuts of a pair of trousers I made last summer, and I had just enough to piece it all together. The crown top on the hat was made by sewing two strips together so that the seam became the centre, which I then top stitched to match the stitching detail on the crown sides. In the end they didn’t match up perfectly, there’s a couple of millimeters discrepancy on each join, but to be honest, it’s just a bucket hat.
I wanted to try the wide brim option as I felt that it would come down my forehead far enough to keep the sun from hitting me from the water’s reflection, and I am so pleased I did as I think it worked really well; it’s functional and looks cute. The stitching process for the classic circles around the brim was great fun as I was not only using scrap material out of stash, but I also ended up finishing three reels of thread in different tones of pink and pinky-brown. As I had to keep changing the threads, I confess that the uniformity of the concentric circles is a bit like a roller coaster, rather than a helter-skelter, but hey, it’s a hat.
As Sunday rolled around and I packed a picnic for the trip, I popped everything I needed into my dry bag, sunscreen included, and off we went to canoe up the river to Frenchman’s Creek, which is a place I have wanted to visit since the winter when I read Daphne Du Maurier’s book, and consequently fell in love with a Pirate. My friend had never read it but is always up for a good adventure, so off we went.
As we got to Durgan to off-loaded the boat into the river, I was very pleased that I had not only remembered the hat and cream, but also that I had chosen to wear a shortie wetsuit. As it turned out, I was going to be the entertainment for all the tourists sitting on the beach for as soon as I lifted a foot out of the water to get in, I slipped and went under the foot of water, with my hat in hand. Spluttering and laughing I got up, caught my breath, and giggled as I saw my friend try not to laugh at the funniest and most idiotic thing I could have done! My new hat was drenched before I had even got in the canoe, and so it remained by my feet as we meandered up the lazy river.
As we paddled past the boats moored up we said hello to people sitting on them enjoying the view and a glass of wine with their lunch. Egrets flew close to the banks as fish jumped and splashed about hunting for insect snacks. Oak trees flowed down the banks of the river into the water, creating tiny eco systems where life could thrive. The sound of water lapping against our little wooden hull reminded me of times as a kid when we would visit the lakes and enjoy BBQs with my family in the States; those halcyon times of the late 80’s when anything seemed possible and making sure there was enough corn on the cob and watermelon to eat was the most important thing to do.
We gently floated along with the current and found Frenchman’s Creek. It was smaller than I had imagined and I couldn’t quite picture how a Piraite’s ship that was as big as the one I had imagined could be hidden there, but there was an old wreck hanging out on a small patch of mud surrounded by a gentle silence that evoked the beauty of Du Maurier’s writing. It was a special moment, and will be forever a picture that I carry in my mind; one filled with peace and stillness.
Heading back to Durgan, we crept into an inlet by The Ferryboat Inn, and as we stopped to watch a heron I felt my shoulders drop and my breath slow right down. “This” I thought to myself, “This is peace”. I hadn’t felt it in me that deeply for decades. The last time was when I was in a canoe, on a lake, in Wisconsin back in 1999 when we were celebrating July 4th. The joy of both moments is that I didn’t have a phone near me. As I sat there on Sunday, with my hat by my feet, I realised that I had left my phone, and therefore my camera, in my kitchen. This moment of peace was one for the memory bank; a very personal time for me to sink into and enjoy, and for some reason I cannot name, it means more to me because of it.
Sewing and knitting my own clothes slows me down a lot, but there is also something about being still and letting the nature around us calm our souls in a way that we can’t do on our own. Being there in companionable silence with a friend who can remember the time with me is magical, and there is a privacy about not having it logged on a phone and backed up to a server. The plop of fish near us, and the splash of our oars, are sounds that can soothe my mind when I am beginning to feel overwhelmed with the plans of the working week. These memories are what enable life to move forward.
My hat made it home to the washing machine safe and well, and didn’t seem the worse off for its inaugural dunking in Cornish salt water; I doubt it will be the last time it sees the sand at the bottom of the shallows. It will also be my reminder of a perfect Spring Sunday on the river, and for that, I am very grateful.
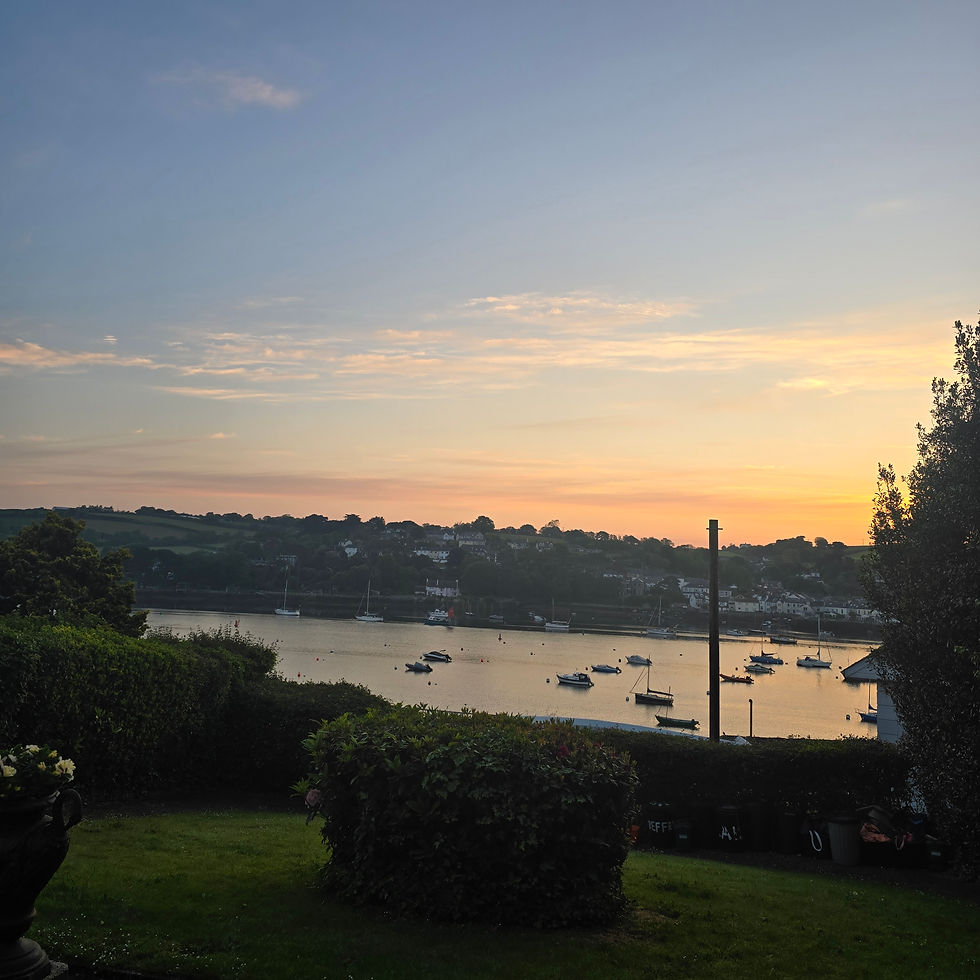
Now, the sun has changed to a brighter light and there are a couple of people starting to move around their boats as I look out the window. The Fal River is flat this morning with a low tide so I can see the patch of sand in Flushing across the other side. My neighbour has just jogged down the path for her morning run, and there are a couple of dog walkers that have walked past. The day is starting, and I need to refill my tea pot.
I hope that you have a wonderful day today, and that you have the opportunity to forget your phone and breathe a little deeper in nature soon.
May your frogging be rare, and your needles always bring you joy.
Love,
Jenny xx